Android App Development is at its peak. Every website is now down to Android Market in order to grab the emerging world of Android Smartphone Users, So why would you like to stay back. We are here with an interesting tutorial which will guide you readers to learn android app development from scratch without having knowledge of Coding in Java/C etc. All you need to have is – Determination and follow this easy guide to build your first android app for your Website/Blog/Personal Use too. After following this guide to Make Android Mobile App for Website Free you will enable yourself to build simple android app for your WordPress or Blogger powered blog or any website too.
The Good news is that – This guide to creating your first android app is totally free. Although many websites might be charging a huge amount for developing Android App for your website.
How to Develop an Android App for Beginners
- Make a rough sketch as to what you want your android app to look like! One of the example of Free Android App created using this tutorial is : Informationlord Android App. Plan out the categories you wanna have in your Android App. Let us take a website : WhatsAppMods to demonstrate you all readers well, I would like to have categories like :
- Mods
- Wallpapers
- Status
- Good Morning Messages
- Good Night Messages
- Updates
- Facebook Page
- WhatsApp Mods In App Browser Link
- Once you have the Categories decided that would be seen in your App in Left side as you might see in Informationlord Android App. Now lets start the real game of setting android development environment. Lol dont get afraid after reading this line! I am just kidding. Android development environment is all setup in a click and is done Online automatically via the site which we gonna use to Create Android App for Free.
- To build your first android app, log on to AppYet website that will setup Online Android Development Environment which will help you to create Android App for Website for free.
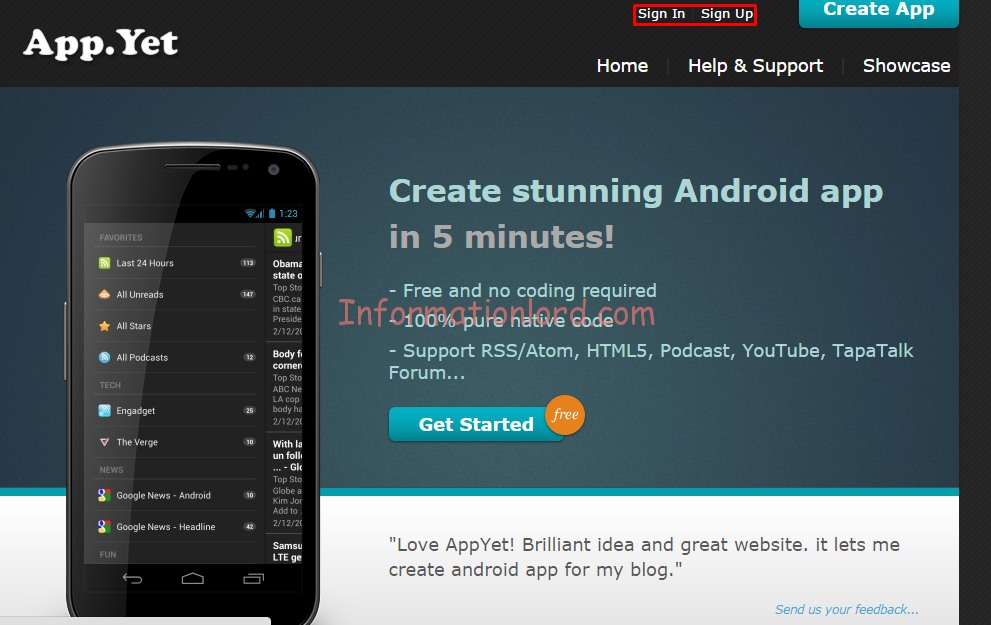 Login or Signup for this website.
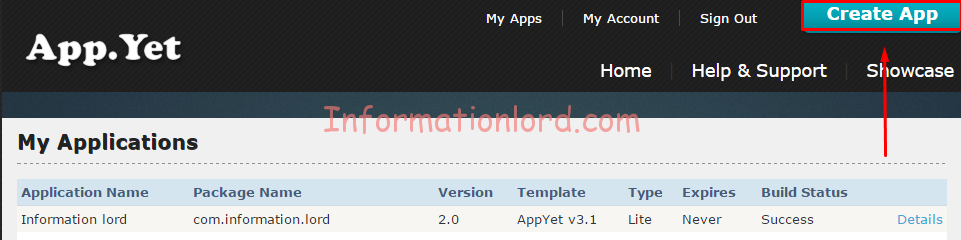
 - Once you are successfully logged in, all you need to do is to click on Create App Tab which you can see in the right most corner of the website, by following tutorial android app development.
- You will now be redirected to Android App Development page wherein you will have to fill in the particulars describing the Android Package name for your Android App, in our case we are using Whatsapp Mods, package name of android app will accordingly be decided, if you are not satisfied by the name provided by the android development environment provider appyet then simply rename it as per your needs.
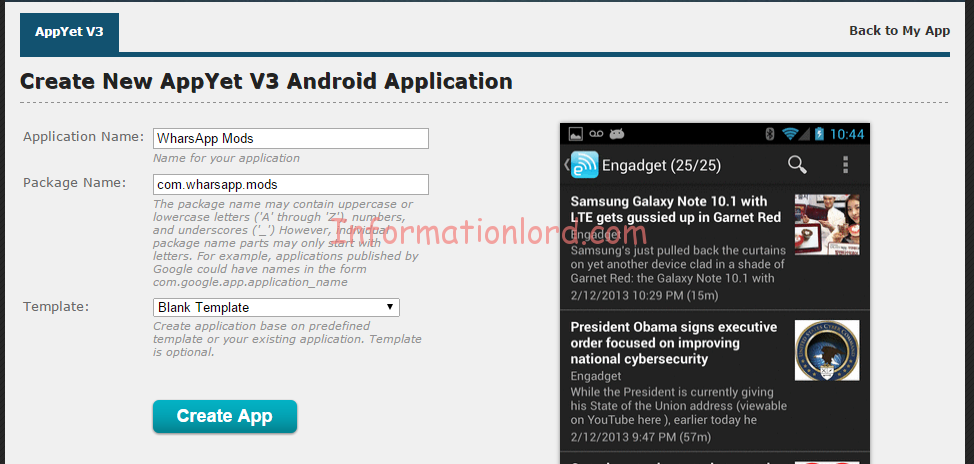 The Template refers to the user interface or Demo Content that this Android App will be equipped with! If you are following this tutorial of android apps development for beginners, then you must go for Blank Template or else choose any one you wish!
 - Once you have created Android App successfully, you will now be redirected to the settings of that App, which will allow you to customize your Android App as per the requirements of the reader.
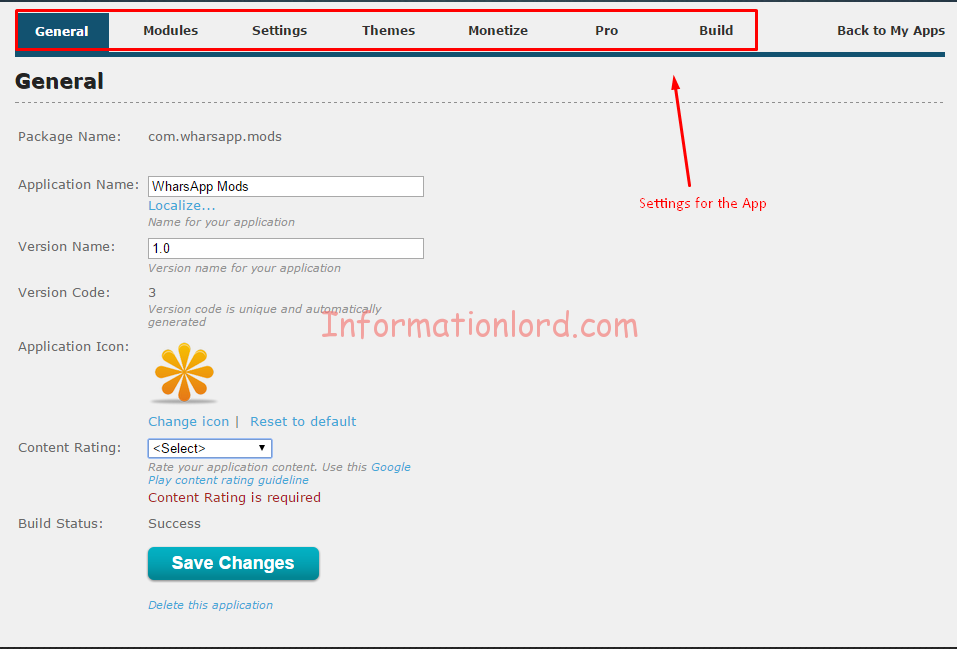 One can simply proceed as per the On Screen instructions and make the mission of how to make mobile app for website very easy and approachable! One can choose Android App Icon, which you wanna choose as default. You can set the Content Rating to Everyone if your website is open to all or if you wanna restrict age access, then simply choose accordingly. Once you are done with the General Settings of the Android App, Proceed To Modules.
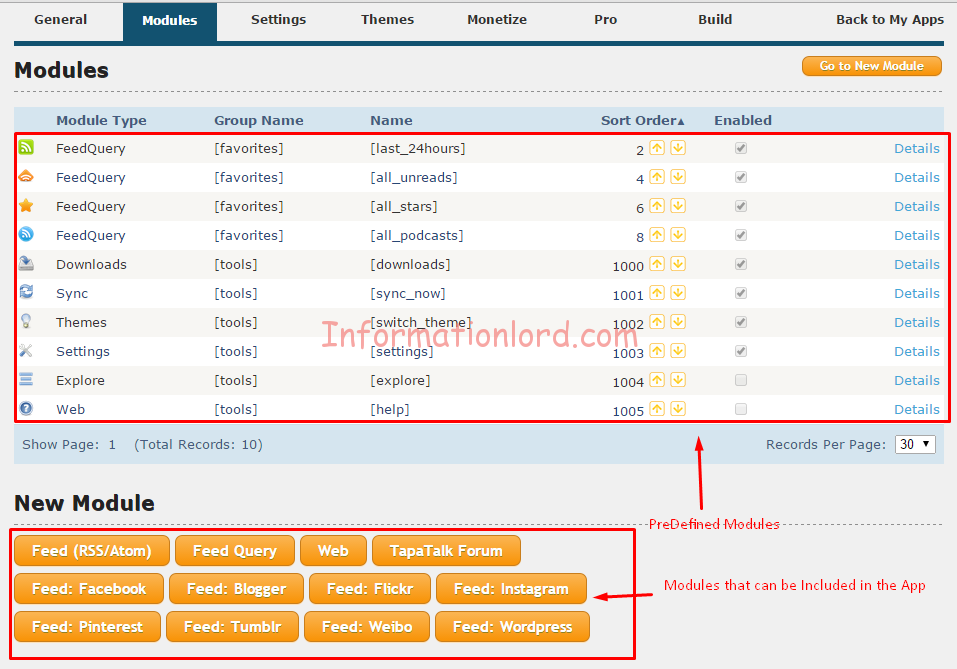
 - Modules basically decides the App categories that we pre-planned in the starting of the tutorial. Our Android App which we created now, comes with preloaded app modules, one can simply remove them, by pressing on the details link infornt of the module name.
 Once you are on this page we will now proceed to Create Categories In Android App, which we decided earlier.
- How to Create Modules/Categories in Android App
- If we are directly bringing WordPress post or Category it is quiet easy, Simply select Feed: WordPress from the section located below in the apps page.
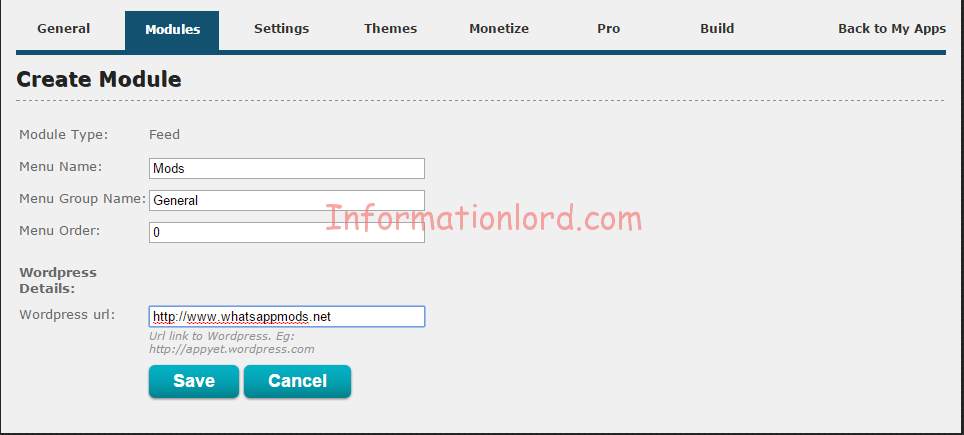 Type in the name of the Menu Name, Group Name, Menu name refers to the Name of the category, Group Name is the General Category that will hold your Menu Name.
 - Once you Save, You will see further settings for that particular category, Wherein you need not to do Much settings. If at all just modify the Words for Article Number Limit.
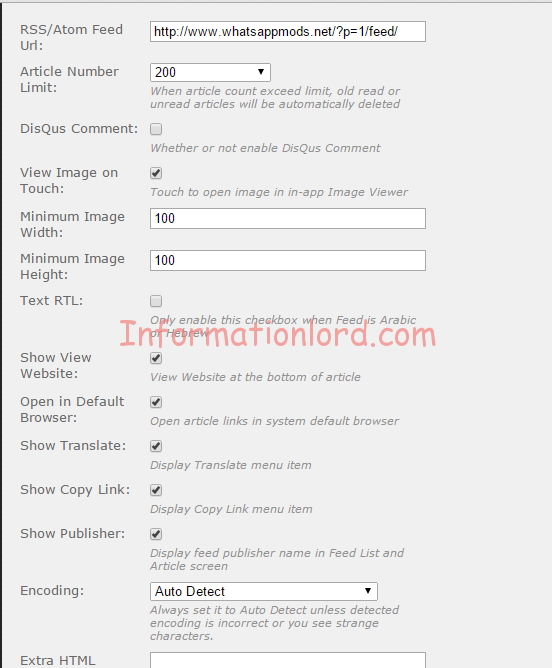 You can set the width and height of the image along with adding Custom HTML to Android App particular category. Add Discus Comments also is possible! Please Note that do not change the /feed/ from the URL that gets auto generated, once you Save the Category. Now Tap on Update.
 - Once you Update the Category of the App, then you can set the custom Icon for that category too by going to General Tab that you see after selecting Update.
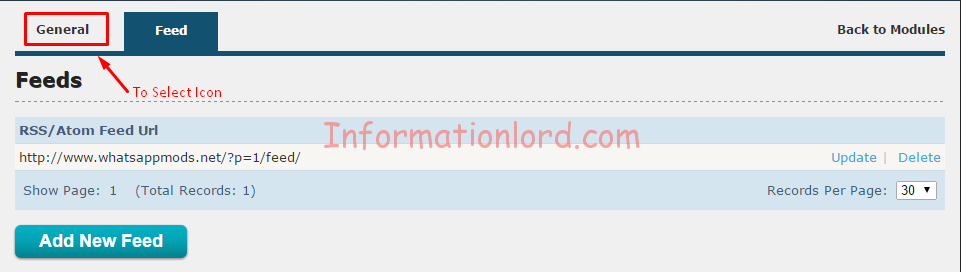
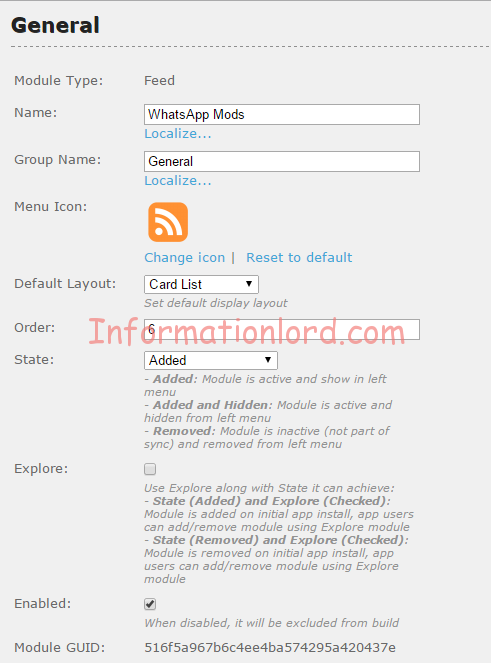 It also allows special settings like setting Order of the Category in the menu and User Interface that can be seen while users loads it. Now tap on Save Changes! And then Click on Back to Modules from Top Right Corner.
- If we are directly bringing WordPress post or Category it is quiet easy, Simply select Feed: WordPress from the section located below in the apps page.
- You will now see that you have successfully created a module for your Android App. So it is very easy to create other Modules too using the same procedure as mentioned above in this tutorial – How to Make Mobile App for Website
- One can use other Modules that were seen earlier, if you are struck anywhere then one can read out How to Use those Modules with different settings (Like Web, Feeds etc..) from here.
- How to Create Modules/Categories in Android App
- Once we have finished with Creating Modules, Now lets jump to Settings in the Android Development Console Website, Wherein you can set few parameters that are understandable if once you go though them, like adding feedback URL, Help link, How you would like your users to get updated, i.e via WiFi or Normal. Save the Changes.
- Jumping to Themes tab, it allows users to select from two options : Light / Dark theme. My preference would be to select light theme as it is quiet more attractive as compared to Dark theme on Android Smartphones.
- Monetize Tab allows users to add their Admob ad code and thereby earn money from it, when users click on the ads displayed in the app.
- Pro tab includes Membership feature which can be activated by paying an amount of 20$. But i would suggest you all to go for free one for initial release of the app.
- Coming to the Build Tab, it is the most important process of Android App Development Online. It compiles the Android App with the changes that you do everytime.
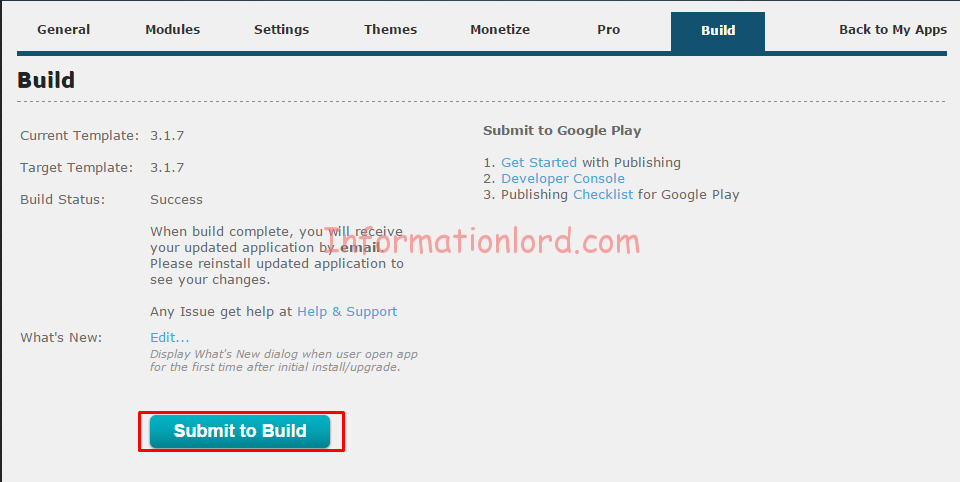 Tap on Submit to Build and simply enjoy a coffee till then. You will get a mail on your Registered Mail id, that will contain your Compiled Android APK file which is in ZIP format, Simply extract it and Install it and thereby enjoy the new Android App you created recently.
 - If you make changes to the app, or want to provide an Update, then do the necessary changes but do not forget to Submit to Build at the End. One can edit What’s New and provide the information that will popup while your users use the Latest Updated Android App for the first time.
This is it. If you have followed how to build your own android app tutorial carefully, then by now you might have got an awesome app to boast with and showoff on Google Play Store. You can create publisher account on Playstore for 25$ or you can apply your request here so that we will upload your Android App for 15$ and also provide full help with your android apps development for beginners.
Do not forget to subscribe to the website and stay updated with tutorials on Android and many other interesting updates!